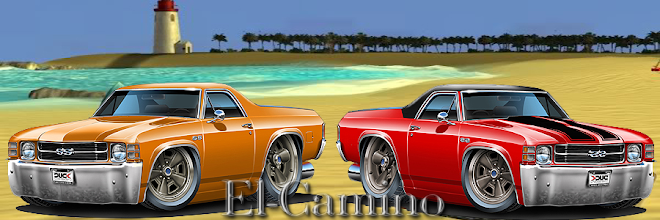
Friday, November 19, 2010

El Camino Recalls

1987 CHEVROLET EL CAMINO Recall - POWER TRAIN:AUTOMATIC TRANSMISSION:LEVER AND LINKAGE:COLUMN SHIFT

Problem: MANUAL VALVE LINK IN THE TRANSMISSION MAY HAVE BEEN IMPROPERLY FORMED.Recall Details - 10/26/1987

1984 CHEVROLET EL CAMINO Recall - SEATS:FRONT ASSEMBLY:RECLINER

Problem: SOME VEHICLES HAVE BUCKET SEAT BACK LOCKS THAT DO NOT CONFORM TO FEDERAL MOTOR VEHICLE SAFETY STANDARD 207, ANCHORAGE OF SEATS. IN EVENT OF A CRASH, THE SEAT BACK LOCK MAY NOT FUNCTION.Recall Details - 2/6/1984

1983 CHEVROLET EL CAMINO Recall - SERVICE BRAKES, HYDRAULIC:FOUNDATION COMPONENTS:HOSES, LINES/PIPING, AND FITTINGS

Problem: THE MASTER CYLINDER REAR BRAKE PIPE, WHICH CARRIES BRAKE FLUID TO THE REAR BRAKES, MAY DEVELOP A LEAK DUE TO EXTENDED CHAFING ON THE AIR CLEANER RESONATOR BRACKET.Recall Details - 10/13/1983

1981 CHEVROLET EL CAMINO Recall - SUSPENSION:REAR

Problem: THE BOLTS THAT ATTACH THE LOWER REAR CONTROL ARM TO THE FRAME MAY FRACTURE. THE REAR CONTROL ARM SUPPORTS AND POSITIONS THE REAR AXLE. FRACTURE OF THE BOLTS WOULD ALLOW THE CONTROL ARM TO DROP FREE.Recall Details - 2/25/1981

1981 CHEVROLET EL CAMINO Recall - WHEELS:CENTER SECTION

Problem: "TX" HEAVY DUTY WHEELS MAY HAVE BEEN MANUFACTURED WITH LAMINATED STEEL. THE WHEEL DISC MAY FRACTURE AND THE WHEEL AND TIRE COULD PARTIALLY OR COMPLETELY SEPARATE FROM THE VEHICLE.Recall Details - 3/23/1981

1980 CHEVROLET EL CAMINO Recall - SUSPENSION:REAR

Problem: THE BOLTS THAT ATTACH THE LOWER REAR CONTROL ARM TO THE FRAME MAY FRACTURE. THE REAR CONTROL ARM SUPPORTS AND POSITIONS THE REAR AXLE. FRACTURE OF THE BOLTS WOULD ALLOW THE CONTROL ARM TO DROP FREE.Recall Details - 2/25/1981

1980 CHEVROLET EL CAMINO Recall - POWER TRAIN:AXLE ASSEMBLY:AXLE SHAFT

Problem: REAR AXLE ASSEMBLY MAY HAVE AXLES THAT WERE IMPROPERLY MANUFACTURED. THIS CONDITION MAY RESULT IN SEPARATION OF THE AXLE SHAFT AND WHEEL ASSEMBLY FROM THE VEHICLE.Recall Details - 11/24/1984

1980 CHEVROLET EL CAMINO Recall - SERVICE BRAKES, HYDRAULIC:FOUNDATION COMPONENTS:DRUM:WHEEL CYLINDERS

Problem: EXCESSIVE ENLARGEMENT OF THE WHEEL CYLINDER PILOT HOLE IN THE REAR BRAKE BACKING PLATE COULD ALLOW THE WHEEL CYLINDER TO ROTATE AND CAUSE LOSS OF BRAKE FLUID. CONSEQUENCE OF DEFECT: A LOSS OF BRAKE FLUID LEADS TO LOSS OF REAR BRAKE ACTION, CREATING THE POTENTIAL FOR AN ACCIDENT. FRONT BRAKES WOULD REMAIN OPERATIONAL.Recall Details - 4/29/1985

1979 CHEVROLET EL CAMINO Recall - SERVICE BRAKES, HYDRAULIC:FOUNDATION COMPONENTS:DRUM:WHEEL CYLINDERS

Problem: EXCESSIVE ENLARGEMENT OF THE WHEEL CYLINDER PILOT HOLE IN THE REAR BRAKE BACKING PLATE COULD ALLOW THE WHEEL CYLINDER TO ROTATE AND CAUSE LOSS OF BRAKE FLUID. CONSEQUENCE OF DEFECT: A LOSS OF BRAKE FLUID LEADS TO LOSS OF REAR BRAKE ACTION, CREATING THE POTENTIAL FOR AN ACCIDENT. FRONT BRAKES WOULD REMAIN OPERATIONAL.Recall Details - 4/29/1985

1979 CHEVROLET EL CAMINO Recall - POWER TRAIN:AXLE ASSEMBLY:AXLE SHAFT

Problem: REAR AXLE ASSEMBLY MAY HAVE AXLES THAT WERE IMPROPERLY MANUFACTURED. THIS CONDITION MAY RESULT IN SEPARATION OF THE AXLE SHAFT AND WHEEL ASSEMBLY FROM THE VEHICLE.Recall Details - 11/24/1984

1979 CHEVROLET EL CAMINO Recall - SUSPENSION:REAR

Problem: THE BOLTS THAT ATTACH THE LOWER REAR CONTROL ARM TO THE FRAME MAY FRACTURE. THE REAR CONTROL ARM SUPPORTS AND POSITIONS THE REAR AXLE. FRACTURE OF THE BOLTS WOULD ALLOW THE CONTROL ARM TO DROP FREE.Recall Details - 2/25/1981

1978 CHEVROLET EL CAMINO Recall - ENGINE AND ENGINE COOLING:COOLING SYSTEM:FAN

Problem: THE HUB PORTION OF THE FAN BLADE ASSEMBLY COULD CRACK DUE TO HIGH STRESS LEVELS GENERATED DURING ENGINE OPERATING CONDITIONS. EVENTUALLY, THE BLADE COULD BREAK APART AT THE HUB AND BLADE PIECES COULD BE PROPELLED INTO THE ENGINE. IF THE HOOD IS OPEN WHILE THE ENGINE IS RUNNING, THE FRAGMENTS WOULD BE FREE TO FLY FROM THE VEHICLE.Recall Details - 6/13/1978

1978 CHEVROLET EL CAMINO Recall - SUSPENSION:REAR

Problem: THE BOLTS THAT ATTACH THE LOWER REAR CONTROL ARM TO THE FRAME MAY FRACTURE. THE REAR CONTROL ARM SUPPORTS AND POSITIONS THE REAR AXLE. FRACTURE OF THE BOLTS WOULD ALLOW THE CONTROL ARM TO DROP FREE.Recall Details - 2/25/1981

1978 CHEVROLET EL CAMINO Recall - POWER TRAIN:AXLE ASSEMBLY:AXLE SHAFT

Problem: REAR AXLE ASSEMBLY MAY HAVE AXLES THAT WERE IMPROPERLY MANUFACTURED. THIS CONDITION MAY RESULT IN SEPARATION OF THE AXLE SHAFT AND WHEEL ASSEMBLY FROM THE VEHICLE.Recall Details - 11/24/1984

1978 CHEVROLET EL CAMINO Recall - SERVICE BRAKES, HYDRAULIC:FOUNDATION COMPONENTS:DRUM:WHEEL CYLINDERS

Problem: EXCESSIVE ENLARGEMENT OF THE WHEEL CYLINDER PILOT HOLE IN THE REAR BRAKE BACKING PLATE COULD ALLOW THE WHEEL CYLINDER TO ROTATE AND CAUSE LOSS OF BRAKE FLUID. CONSEQUENCE OF DEFECT: A LOSS OF BRAKE FLUID LEADS TO LOSS OF REAR BRAKE ACTION, CREATING THE POTENTIAL FOR AN ACCIDENT. FRONT BRAKES WOULD REMAIN OPERATIONAL.Recall Details - 4/29/1985

General Motors Basics

General Motors


Detroit-based General Motors Co. (often referred to as GM) was founded by William C. Durant. Since its founding, GM has become one of the largest car manufacturers in the world.


Chevrolet is a GM brand company that has an almost 100-year history. Started in 1911 by a racecar driver names Louis Chevrolet


Detroit-based Chevrolet vehicles  are the product of 2 men--a former bicycle repairman with a genius for producing simple, well-made cars and a savvy businessman adept at making backroom corporate deals. The partnership produced a vehicle that became General Motors' top-selling car for most of the 20th century.


The Mechanic


Louis Chevrolet was raised in France, worked as a bicycle mechanic and later as a race car driver before he began building cars.


The Brains


American Willy Durant, founder of General Motors, which served as an umbrella company for several car brands, had been ousted from GM in 1910 and wanted to rebuild his reputation.

The Car


From 1911 to 1913, Chevrolet built the Series C touring car with a 6-cylinder engine generating 40 horsepower, achieving his goal of a worthy rival to the Ford Model T.


The Partnership


Durant saw Chevrolet's car as his next project, agreed to secure financing and, by 1915, opened a manufacturing plant in Toronto, Canada.
GM Again


Using profits from Chevrolet car sales, Durant purchased a majority interest in GM again, assumed control and brought the new car into the company fold.
Falling Out
When this 1925 model was produced, Durant and Chevrolet had nothing to do with the company.

Chevrolet disagreed with Durant over the car's future and sold his financial interest to Durant, but Durant was ultimately forced out of GM by 1921 in a dispute with the board of directors.

How to Repair a Water Pump on a Chevrolet El Camino

Things You'll Need:

  • Wrench set
  • Waste oil collection pan
  • Pliers
  • Socket set
  • Masking tape
  • Marker
  • Flat razor blade
  • RTV silicone sealant
  • Antifreeze


    Draining the Cooling System


    1. Park the El Camino on a level surface.
    2. Disconnect the ground cable from the negative battery terminal by loosening the retaining bolt with a wrench. Then pull the clamp off the terminal.
    3. Locate the petcock valve on the lower left corner of the radiator, and place a waste oil collection underneath it.
    4. Open the petcock valve by turning it counterclockwise with pliers. Allow the radiator to drain completely, then close the valve.


    Removing the Engine Fan and Shroud


    1. Unscrew the bolts that connect the radiator fan shroud to the radiator, using a socket. Slide the shroud back toward the engine.
    2. Unscrew the bolts that connect the radiator fan to the water pump hub, using a wrench.
    3. Lift the fan upward to remove it from the Chevy.
    4. Lift the shroud up to remove it from the vehicle.


    Removing the Alternator


    1. Loosen but do not remove the alternator mounting bolts, using a socket.
    2. Slide the alternator toward the engine.
    3. Pull the drive belt off the alternator, water pump and crankshaft pulleys, using your hands. Then remove the belt from the vehicle.
    4. Pull the pulley off the water pump hub, and remove it from the vehicle.
    5. Label and disconnect the wiring from the back of the alternator, using masking tape and a marker.
    6. Unscrew the bolts that connect the alternator to the mounting bracket, using a socket.
    7. Pull the alternator away from the mounting bracket, and remove it from the vehicle.
    8. Unscrew the bolts that connect the alternator mounting bracket to the water pump, using a socket.


    Removing the Water Pump


    1. Loosen the hose clamp that connects the lower radiator hose to the water pump, using a socket.
    2. Pull the lower radiator hose off the water pump by hand.
    3. Loosen the hose clamp that connects the heater hose to the water pump, using a socket.
    4. Pull the heater hose off the water pump.Unscrew the bolts that secure the water pump to the engine block.
    5. Pull the water pump away from the engine block, and remove it from the vehicle.


    Installing the El Camino Water Pump

    1. Clean the water pump mounting surface on the engine block, using a flat razor blade.
    2. Coat both sides of the new water pump gaskets with a thin layer of RTV silicone.
    3. Place the gaskets in position on the engine block.
    4. Lower the new water pump into position. Screw in the bolts that connect the water pump to the engine block, using a socket.
    5. Slide the heater hose onto the water pump. Tighten the hose clamp that secures the hose to the water pump, using a socket.
    6. Slide the lower radiator hose onto the water pump. Tighten the hose clamp that secures the lower radiator hose to the water pump, using a socket.


    Reinstalling the El Camino  Alternator


    1. Lower the alternator mounting bracket into position. Screw in the bolts that connect the alternator mounting bracket to the water pump.
    2. Slide the alternator into position. Use your hand to loosely screw in the bolts that connect the alternator to the mounting bracket; do not tighten.
    3. Reconnect the wiring harness to the back of the alternator, using the labels made during disassembly.
    4. Slide the water pump pulley onto the water pump hub.
    5. Loosely lay the drive belt over the crankshaft, water pump and alternator pulleys. 


    Reinstalling the El Camino  Fan and Shroud


    1. Lower the radiator fan shroud into position between the radiator and the engine.
    2. Drop the radiator fan into position between the radiator and fan shroud.
    3. Screw in the bolts that connect the radiator fan to the water pump, using a socket.
    4. Slide the radiator fan forward against the radiator.
    5. Screw in the bolts that connect the radiator shroud to the radiator.
    6. Slide the alternator away from the engine until the drive belt is tight.
    7. Tighten the alternator mounting bolts. 


    Refill the Cooling System

    1. Open the radiator cap by pressing down on it and turning it counterclockwise.
    2. Refill the radiator with a 50/50 mix of antifreeze and water.
    3. Reconnect the ground cable to the negative battery terminal by sliding the clamp over the terminal. Tighten the retaining bolt with a wrench.
    4. Start the engine and allow it to run for five to 10 minutes with the radiator cap off. This will bleed air from the cooling system.
    5. Stop the engine and add more coolant if necessary.


How to Replace an El Camino Oxygen Sensor

Things You'll Need:

  • Car lift 
  • Safety glasses 
  • Penetrating oil
  • Box-end hand wrench set 
  •  Screwdriver Replacement oxygen sensor 
  • Anti-seize compound
  1. Lift the El Camino onto a car lift and bring it up to a comfortable height to work at from underneath. Put on the safety glasses before getting under the vehicle.
  2. Locate the catalytic converter near the center of the El Camino's undercarriage and follow it to the front Y-pipe for the oxygen sensor.
  3. Follow the wire coming from the oxygen sensor to the nearby wire harness plug. Unplug the sensor wire from the harness plug.
  4. Spray the exposed threads of the sensor with a generous amount of penetrating oil.
  5. Place the wire through the closed end of a box-end wrench and place the wrench on the hexagon-shaped base of the sensor. Turn the sensor counterclockwise to unthread it from the exhaust pipe. Remove the oxygen sensor. If necessary, apply heat to the exhaust pipe area and expand the metal of the pipe to help remove the sensor.
  6. Apply a light amount of anti-seize compound on the threads of the replacement sensor. Do not let the compound come into contact with the sensor's head.
  7. Screw the sensor into the exhaust pipe's porthole by hand and then snug it tightly with the wrench.
  8. Plug the oxygen sensor wire back into the wire harness plug.


1981 El Camino Specs

 New features for the 1981 El Camino included a new Computer Command Control and a redesigned grill.

Engine and Transmission

Standard on the 1981 El Camino was a 3.8-liter V-6 engine with 110 horsepower. Optional engines included a 4.4-liter V-8 with 115 horsepower and a 5.0-liter V-8 with 150 horsepower. El Caminos sold in California did not have the option of the 4.4-liter V-8 engine. The engines all included GM's new Computer Command Control (CCC) emission system. A three-speed manual transmission was standard, with the option of a three-speed automatic transmission. A lock-up torque converter was added to the three-speed automatic to aid highway gas mileage.

Exterior

Beginning in 1978 and lasting until it was discontinued in 1987, the El Camino was made smaller and given more modern, updated styling. The El Camino of those years shared its platform and style with the Monte Carlo and Malibu. Front fender moldings, body-side moldings and tailgate moldings were available, as well as bumper guards and bumper rub strips. The El Camino's wheelbase measured 117.3 inches, the overall length was 202 inches, the overall width was 72 inches and the overall height was 55.5 inches. The 1981 Chevy El Camino weighed about 3,428 lbs. The front tires were size P215/65-R15 and the back tires were size P205/70-R14.

Interior Features

Interior features available on the 1981 El Camino included air conditioning, an electric clock, a six-way power driver's seat, a comfort-tilt steering wheel, power windows and door locks, tinted glass and Cruise Control. Radio options for the El Camino consisted of an AM radio or an AM/FM stereo radio with the choice of a cassette player or an eight-track tape player. Also available was the option of a CB with a power tri-band antenna.

How to Remove the Starter on a 1981 El Camino

Things You'll Need:

  • Jack
  • Jack stands
  • Open-end wrench set
  • 3/8-inch ratchet, extension and socket set
  1. Open the hood and disconnect the negative post from the battery, using an open-end wrench. Do the same for the positive post, then lift up the front of the car, using the jack, and set it down on the jack stands.
  2. Locate the starter on the driver's side of the engine, where the engine connects to the transmission. Disconnect each wire from the starter, using an open-end wrench.

  3. Unbolt the bracket from the side of the starter, using the ratchet, then remove the heat shield in the same manner (if so equipped).

  4. Unbolt one bolt from the starter, using the 3/8-inch ratchet, extension and sockets. Support the starter with one hand, then unbolt the remaining bolt; lower the starter carefully from the engine.

Thursday, November 18, 2010

A long time since the last post

I have the not posted in a while the working of my El-Camino is going to be a slow process due to money restrictions have the started and new battery need to shim the starter to see if that clears up the starting issues if not will have to look deeper into the motor and flywheel. will post updates when I can.